
User Guide
This is a user guide for the use and maintenance of the Women Partners website
Getting Started
The Webflow editor is how you will add and change the content of your website. It's pretty intuitive but if you are not very familiar with Webflow, I highly recommend you to take the Webflow Client Guide here.
Account creation
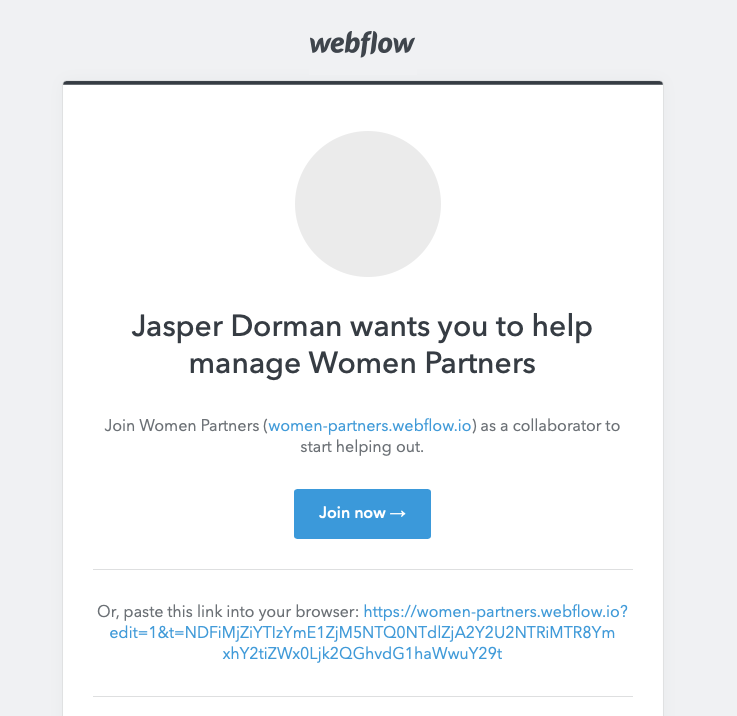
You should receive an email from Webflow with a link/button to create your account.
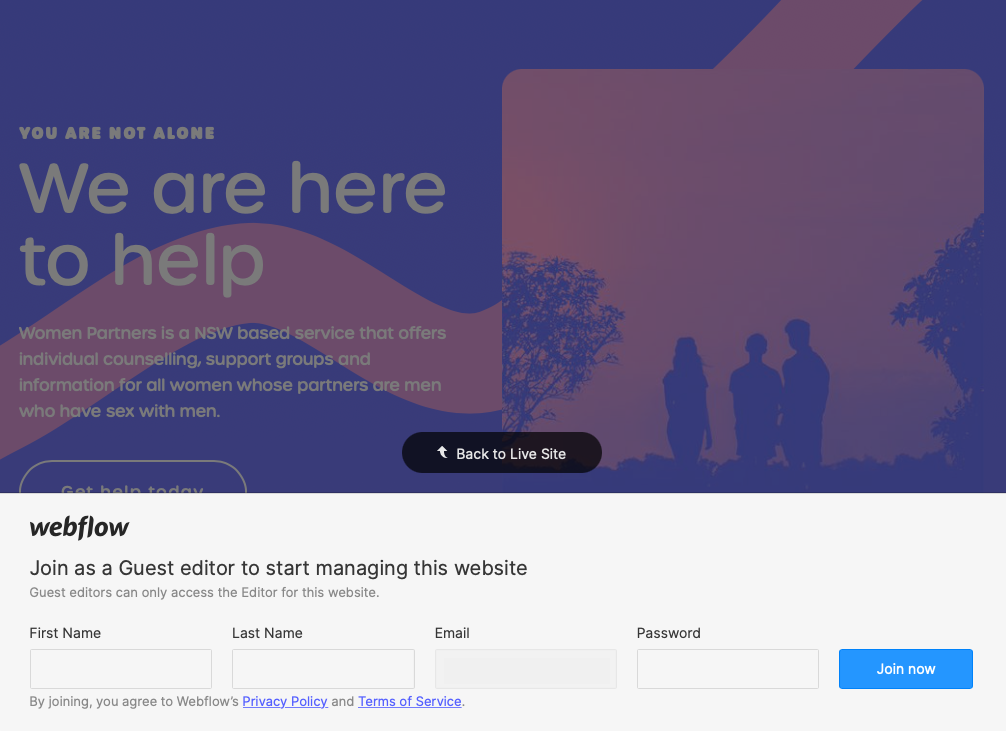
Click or open the link in a browser and enter your details and click "Join now". Congrats your Webflow editor account has been created.
Login
Once you've created your account the browser should automatically detect that you have an editor account and when accessing the live site it should display an arrow tab on the lower right-hand side.
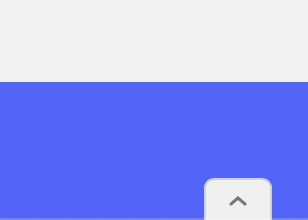
If you cannot see this button, you can also access the site's Webflow editor by adding "?edit" to the URL of the site.
Pages
Static Pages & Collection Pages
A static page is simply a page that I have built out, tailored to the specific content. A Collection page is essentially a page template where the content can be dynamically added and updated using the database in your Collections page. This saves you a lot of time as you don’t have to manually create and style a new page for each entry.
Page Hierarchy
Home - A landing page divided into dynamic sections to cover each aspect of Women Partners.
About - Provides a brief overview of Women Partners, their values, history and services.
Services - A landing page for the services offered by Women Partners. With an emphasis on client-facing services with a follow-up section on professional learning.
- Counselling - A collection page covering information about the Counselling service
- Support - A collection page covering information about the Support service
- Information - A collection page covering information about the kinds of information you provide, with a link to the online information centre.
- Professional Development - A collection page with functionality for signing up for future Webinars and downloading resources
Information Centre - A collection of all information centre categories including resources, articles and news.
- Resources - A collection of links, brochures, free downloads, references to other sites etc.
- Articles - A collection of academic research articles, newspaper and magazine stories etc.
- News - A collection of company updates and announcements, news about new group programs or services etc.
Contact - Enquiry form followed by FAQs and location and opening hours information
Terms and Conditions - Privacy statement, content policy and disclaimers
Utility pages
Authors - A hidden collection page containing a list of authors for information centre items. Not publicly visible.
404 - An error page that shows when a link is broken
Password - The password page will appear when turning on password protection for other pages on the site
Style Guide - A guide covering the design elements of the Women Partners brand and website
User Guide - This page (the one you are currently on) gives a brief introduction to using, editing and publishing content on this website.
Log in, Sign up, Update password, Reset password - these utility pages are used for the professional development account setup and change of details.
Access denied - This page will display when a user tries accessing a page without permission to do so. They either don't have an account or they have not yet logged in.
Restricted access pages
These pages are only accessible if the user is logged in.
Professional development portal - This is the home page for logged in users. Users can browse past and future webinars and access the settings for their account to change information.
Webinar - A similar page to the blog page but allows for two states.
- Upcoming Webinar (Register) - This is for if/when live webinars are conducted. This will allow users to register to that specific and receive a link to join the live broadcast on the date specified or just be notified of when the webinar and quiz is live on the website. All email notifications can be done manually by downloading the form submissions and filtering by the specific webinar.
- Previous Webinar (Certificate) - A previous webinar is any webinar that the user can watch and complete now. It has a quiz and certificate module after the Webinar description that can be completed to trigger the download of their certificate.
User account - This page allows the user to edit all information related to their account except their email.
Content
The Webflow editor allows you to change the content of the site without needing to set up any styling or create any pages from scratch. You still have plenty of control over text styling like bold, italic and underline, different heading sizes and bullet points, as well as the ability to add images, links, videos and embeds.
Editing content
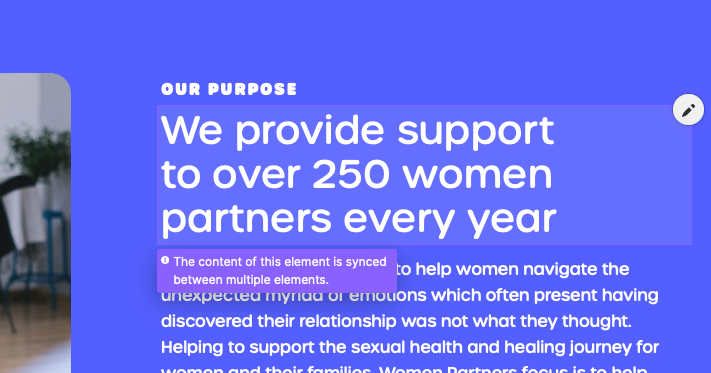
You can edit content directly on the page by clicking the pencil edit icon next to the text you want to change. Individual collection pages can also be edited via the collections tab.
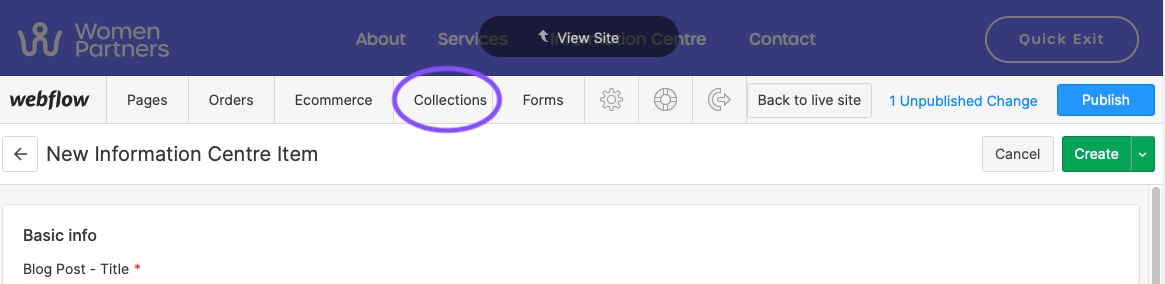
Adding content
To add content to the Information Centre or Services page. Navigate across to the collections tab, select the collection you want to add content to and click the plus symbol to create a new page. Fill in the content and save it as a draft or publish it to the site.
Drafts and Publishing
The publish button will update the live site with any changes you have made across the whole site. You can see how many changes have been made listed next to the button as "Unpublished changes". When adding or editing content that is not quite ready to appear on the live site, you can opt to save the content as a draft and come back to it later. If there is more than one person adding content at the same time, it would be best to check in with them to make sure they are ready to publish the site.
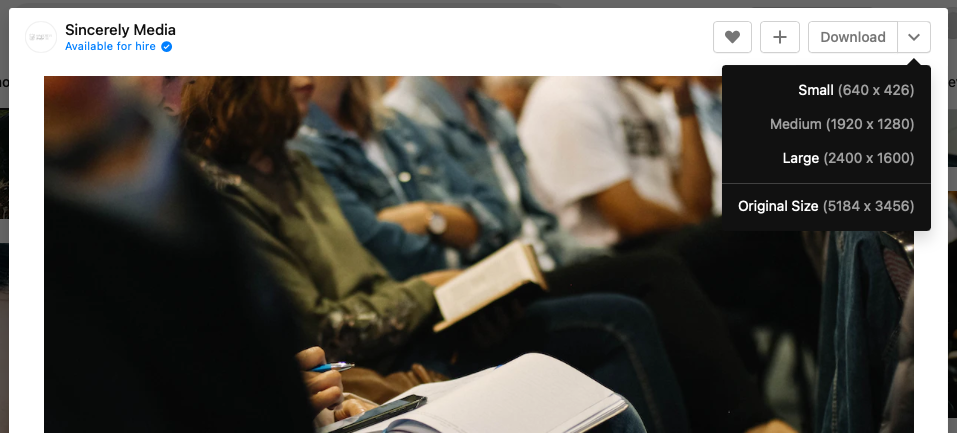
Photography
All images used across the Women Partners site are licensed for free and can be for personal and commercial use. If you'd like to use any specific image, you can check the licenses and download the images for free on Unsplash, Pexels, Freepik and Pixabay.
Image Size
When uploading images please ensure the size is around 500kb and no more than 1mb. The best way to do this is to choose the small, medium or large options when downloading the images from sites like Unsplash.
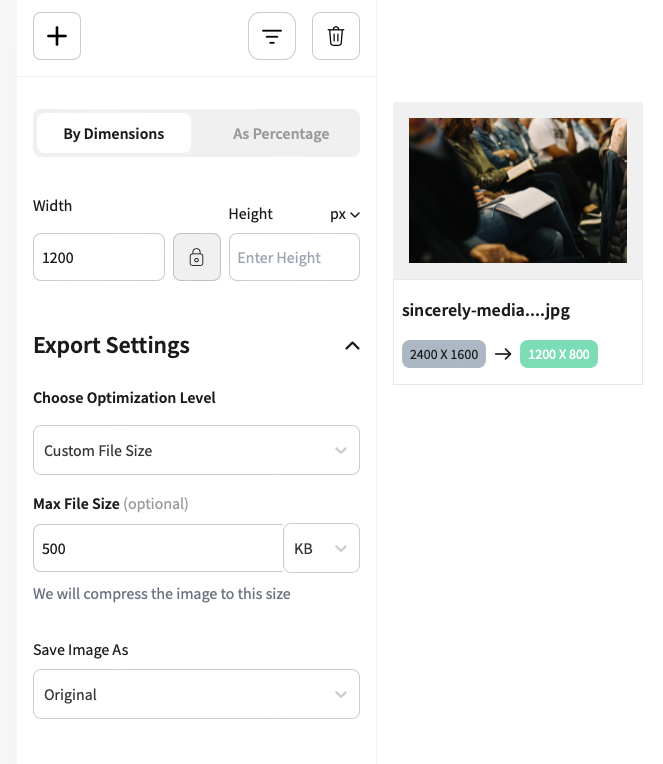
Alternatively, use an image resize and compression service like this one (imageresizer.com) to resize the image/s to your desired pixel width (typically, no more than 1200 pixels) and set a maximum file size of 500kb.
Professional development portal
The professional development portal is a section of pages that can only be accessed by users who have registered and are signed in.
Portal page
The portal page is the main point of access for registered users. It has an area for portal notifications that can be edited directly on the page and links to change account details. After this is a list of past and future webinars.
Webinars
Each webinar page is similar to an information centre page (with short and long descriptions, author and links), except that it only supports a video as the featured content at the top of the page. A webinar can be set as either past or future; a previous webinar or an upcoming webinar, respectively.

Videos
Webinar videos must be hosted on a public video hosting site like Vimeo or YouTube. To upload a video and obtain its link, first, select the desired video file from your device. Then, upload the video to a file-hosting platform or video-sharing website by following their specific upload instructions. Once the upload is complete, the platform will provide you with a unique URL or link that can then be pasted into the video field for the relevant webinar page.
Helpful resources:
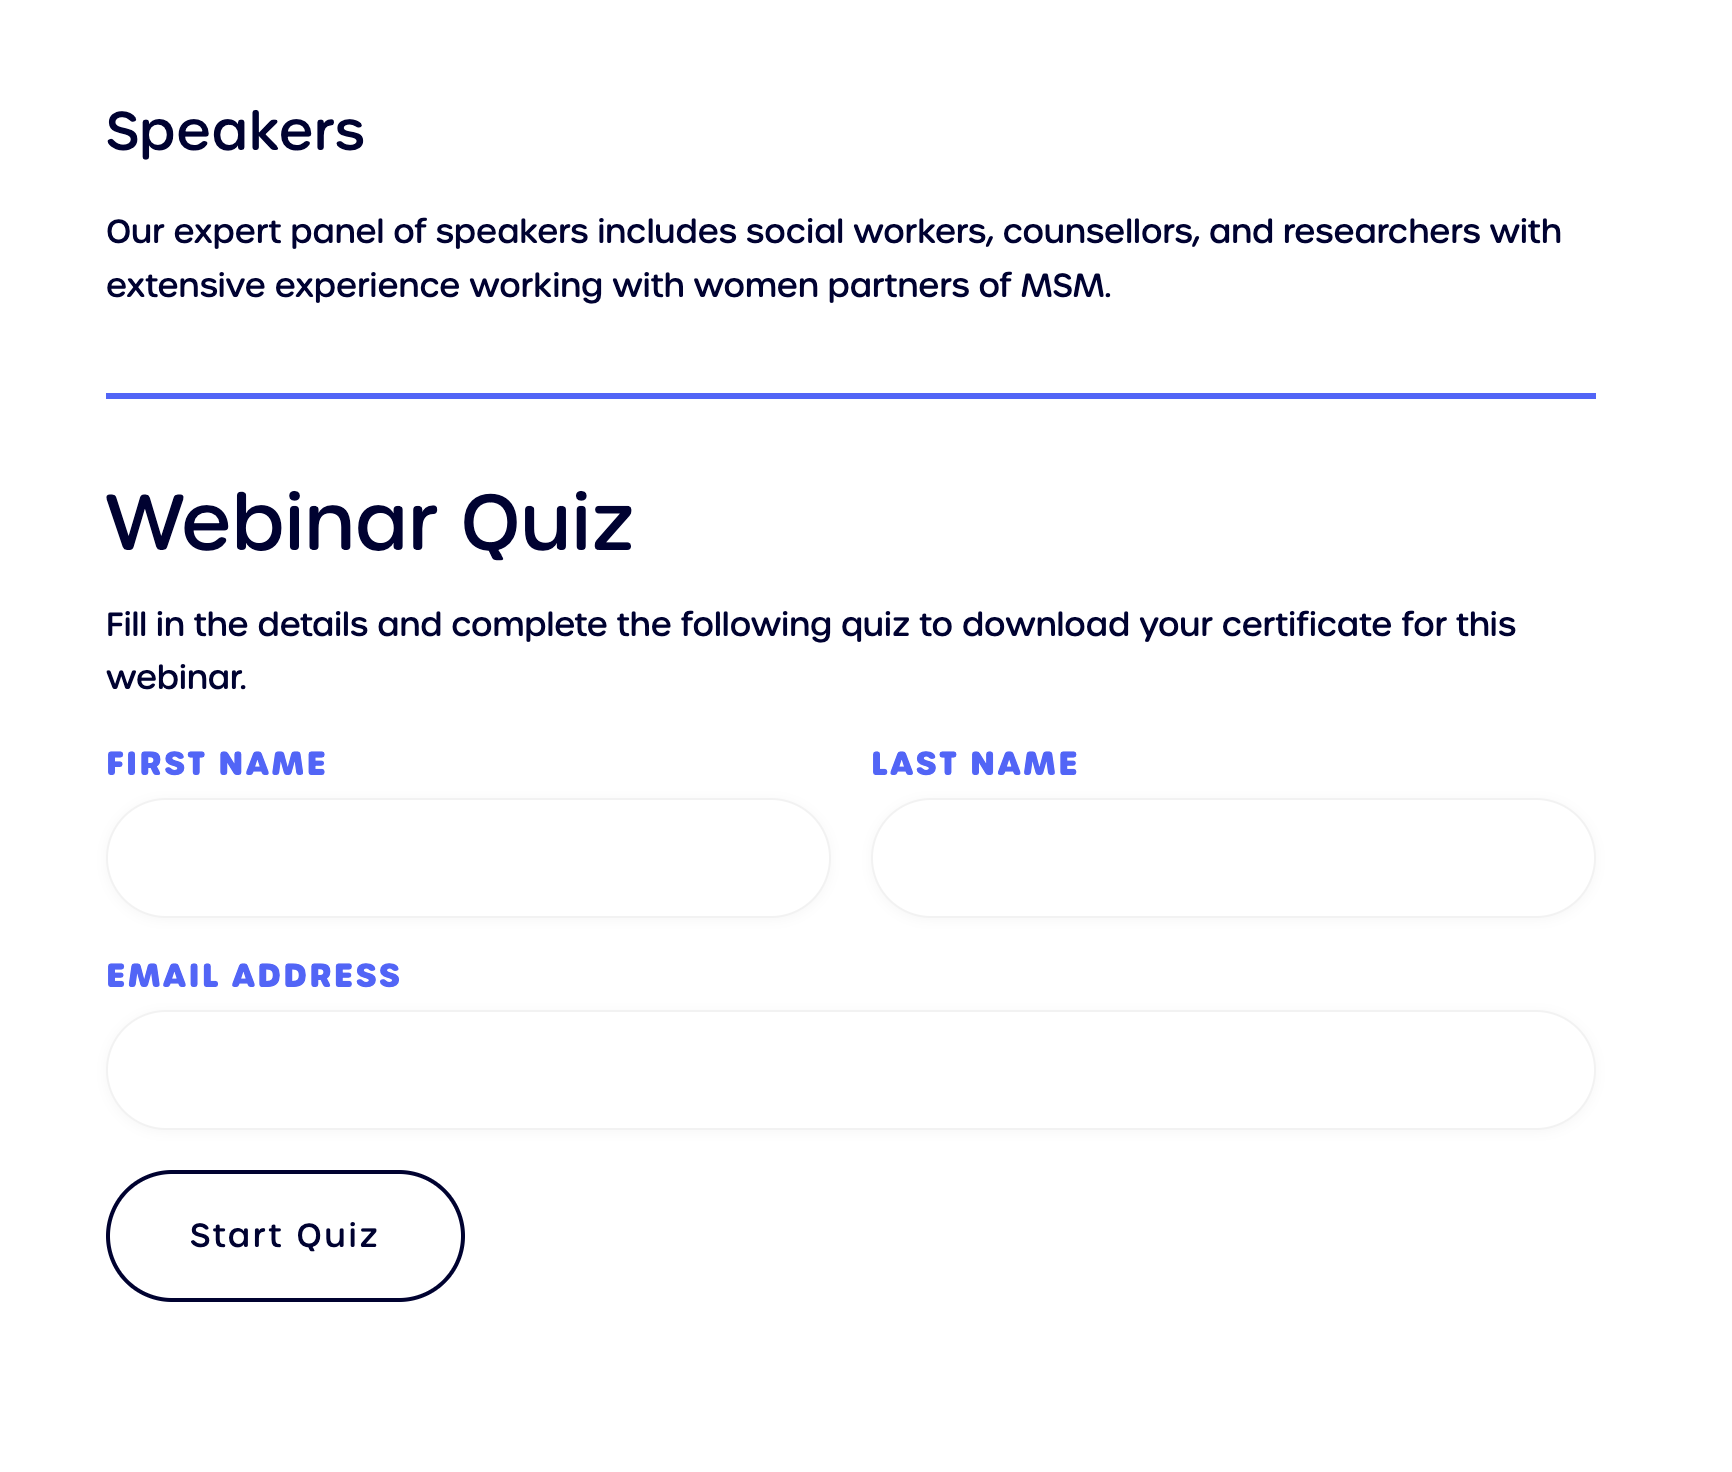
Quiz
For flexibility and ease of use the quiz component of the webinars are provided using Typeform. After logging in and creating your quiz, publish it, and Typeform will generate a unique link that can then be pasted into the Typeform quiz link field for the relevant webinar page.
Additionally, hidden properties ("first_name", "last_name", and "email") may be used to reference the users name or email where relevant.
Helpful resources:
Certificates
For a user to generate and download a webinar certificate they are required to complete a quiz. Before starting a quiz, the user is required to input their name and email to verify their information. This information is then used on the certificate once the quiz is completed. In the Webflow Editor, each webinar page has separate fields for the information that should appear on the certificate. These fields must be filled in otherwise the user will download a blank certificate.
Any questions?
If you run into any issues or still have questions about using the Webflow editor that can't be answered by a quick Google search, please reach out and contact me and I will do my best to help you out.